So many projects require that you use data from an API, so here is a React JS example of how to do just that. I’ll cover how to use fetch to interact with the API, how to get data from the API, and how to use .env files to securely store environment specific properties. I will use https://fakestoreapi.com as it is a free to use API with an endpoint for most typical use cases, with good documentation and it returns nicely formatted json. It also doesn’t require any particular authentication, so perfect for using to learn how to fetch json data from an Api service in React JS. You may also be interested in another post I’ve written which is specifically about getting data from the WordPress API using React JS.
If you’d rather use Axios to get your data from an API in a React app, I’ve written a post about that too.
Table of contents
What is Fetch in React JS?
Fetch is a tool that’s built into most modern browsers, and it enables us to make easy HTTP requests, using an endpoint (a specific url) to get data from an API. You don’t need to install any packages, it is ready to use as soon as your React app is set up.
Create a React JS app to get started
On your command line, type the following. I have called my project react-api-example, you can obviously call it something else, and replace all mentions of react-api-example with your own project name.
npx create-react-app react-api-example
Get all products from the API
Now add a services folder and a file in it called apiService.js and add this code to the file :
let apiBaseUrl = "https://fakestoreapi.com/";


const getProductsFromApi = () =>
  new Promise((resolve, reject) => {

    const productsEndpoint = apiBaseUrl + "products";

    console.log("API URL " + productsEndpoint);

    fetch(productsEndpoint)
      .then((res) => res.json())
      .then((response) => {
        resolve(response);
      })
      .catch((err) => {
        reject(err);
      });
  });

const apiData = {
  getProductsFromApi,
};

export default apiData;
How to store the API endpoint url
The property apiBaseUrl stores the common ‘base’ of any endpoint we will call, in this case “https://fakestoreapi.com/” – this saves you having to retype it and also makes it easier to switch to a different environment, as you can just change the 1 property if your base url needs to change.
The property productsEndpoint stores the full endpoint for this request, and it’s built by joining together the base url and the specific endpoint for this method, which in this case is ‘products’ to return all the products data. So the productsEndpoint should contain the string “https://fakestoreapi.com/products”.
How to fetch the data from the API
The method getProductsFromApi requests data using fetch from the endpoint defined in productsEndpoint. When the promise returns we call json() on the result which resolves the json response as a JavaScript object (read more about res.json() here). When I’m developing I tend to include a console.log message here that prints out the full productsEndpoint url in the console, which makes it easy to spot any issues in how you’ve defined the details. Now the apiService file is ready, we can use it back in App.js.
Show the API data on the page
Next modify the code in the App.js file to use the getProductFromApi method to so we can show the data on the page. A typical scenario is where you want to show a list of items on the screen and then let your user click on any item to view more detail. You’ll have to use one endpoint to get the list, and then another endpoint to get the detail. So we’ll show our list on page first. You can copy this code and replace all the code in your App.js file with this:
import React, { useState, useEffect } from "react";
import apiData from "./services/apiService";
import "./App.css";
function App() {
const [idButtonText, setidButtonText] = useState("");
const [products, setProducts] = useState([]);
useEffect(() => {
setidButtonText("Get data");
}, [idButtonText]);
const handleSubmit = (event) => {
event.preventDefault();
getProducts();
};
const getProducts = async () => {
setidButtonText("Getting data ....");
try {
await apiData.getProductsFromApi().then((data) => {
setProducts(data);
setidButtonText("Got data!");
});
} catch (err) {
setidButtonText("Oh, problem!");
console.log(err);
}
};
return (
<div className="App">
<header className="App-header">Api Test</header>
<div className="container bg-gray-100 pt-4">
<h2>Get Fakestore API data</h2>
<form onSubmit={handleSubmit}>
<button className={"btn btn-blue"} type="submit">
{idButtonText}
</button>
</form>
<span id="bpdata">
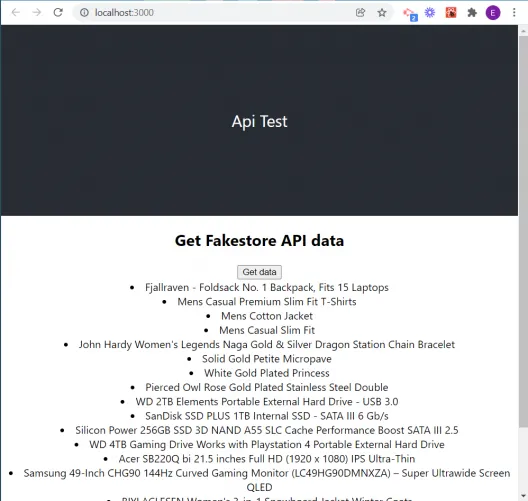
{products.map(function (product, id) {
return <li key={id}>{product.title}</li>;
})}
</span>
</div>
</div>
);
}
export default App;
Save the changes and type npm start to run this now and you should see a screen like this:
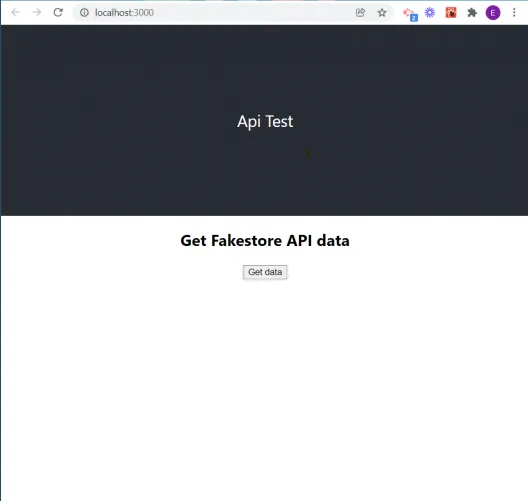
I’ve tried to keep things to the minimum so that we can focus purely on how to fetch the data from the API and onto the screen using React JS. So there is no special styling at all and doesn’t look too pretty, but it does the basics. If you want to add some styling you may find my posts about using Tailwind CSS to style a React website, or using Bootstrap with React JS useful. You may notice that I’ve made the button text dynamic so that we can change it to provide feedback to the user. It tells them when we are waiting for the data, and also tells the user if there is a problem, or confirms we got the data ok. You can adapt this to suit your own needs.
Use .env files to store environment values securely
Now we’ll add a .env file to the root of the solution, it should sit in the same location as your readme.md file. .env files enable you to store environment values securely, in this case we’ll be storing the API url in it. Why would we do that? It’s definitely overkill for this particular example but for most API’s you need to provide a private key, or a token, with each request, that will tell the Api you’re allowed to use it. It will then authorise you to receive data. If you don’t provide the key then will get an ‘unauthorised‘ error and no data. You should never store a key, password, or token in plain text in the code, so .env files give you a secure way to keep this information, as they don’t ever get pushed to a remote repo.
If you were to develop the code in this example for a production system you may end up having several environments, let’s say DEV and PROD. You would be using a dev version of your Api in the DEV website, and a prod version of the Api, in the PROD website, so you’d want to specify different base urls, along with potentially different authentication keys, so you use one .env file per environment. So once you’ve created your .env file, copy this code and save it:
REACT_APP_API_URL=https://fakestoreapi.com/
Any property stored in here must have a name starting with REACT_APP_xxxx. Also note the string is not stored in quotes. When you publish your deployed code to a service like Heroku, or Vercel, you set the environment variables up within their UI.
Finally we will update our apiBaseUrl definition in the apiService.js file so that it looks like this:
// the old definition
// let apiBaseUrl = "https://fakestoreapi.com/";


let apiBaseUrl = process.env.REACT_APP_API_URL;
Summary
Now that we’ve completed this React API example, you know how to use fetch data from an API using React JS and show it in your application.
In the next post we’ll edit the code to include a limit to the number of results we request from the Api, we’ll add a bit more data to each product, and we will make the product title clickable, so you can navigate to a product detail page.